Introducing the New CFM Web Detector

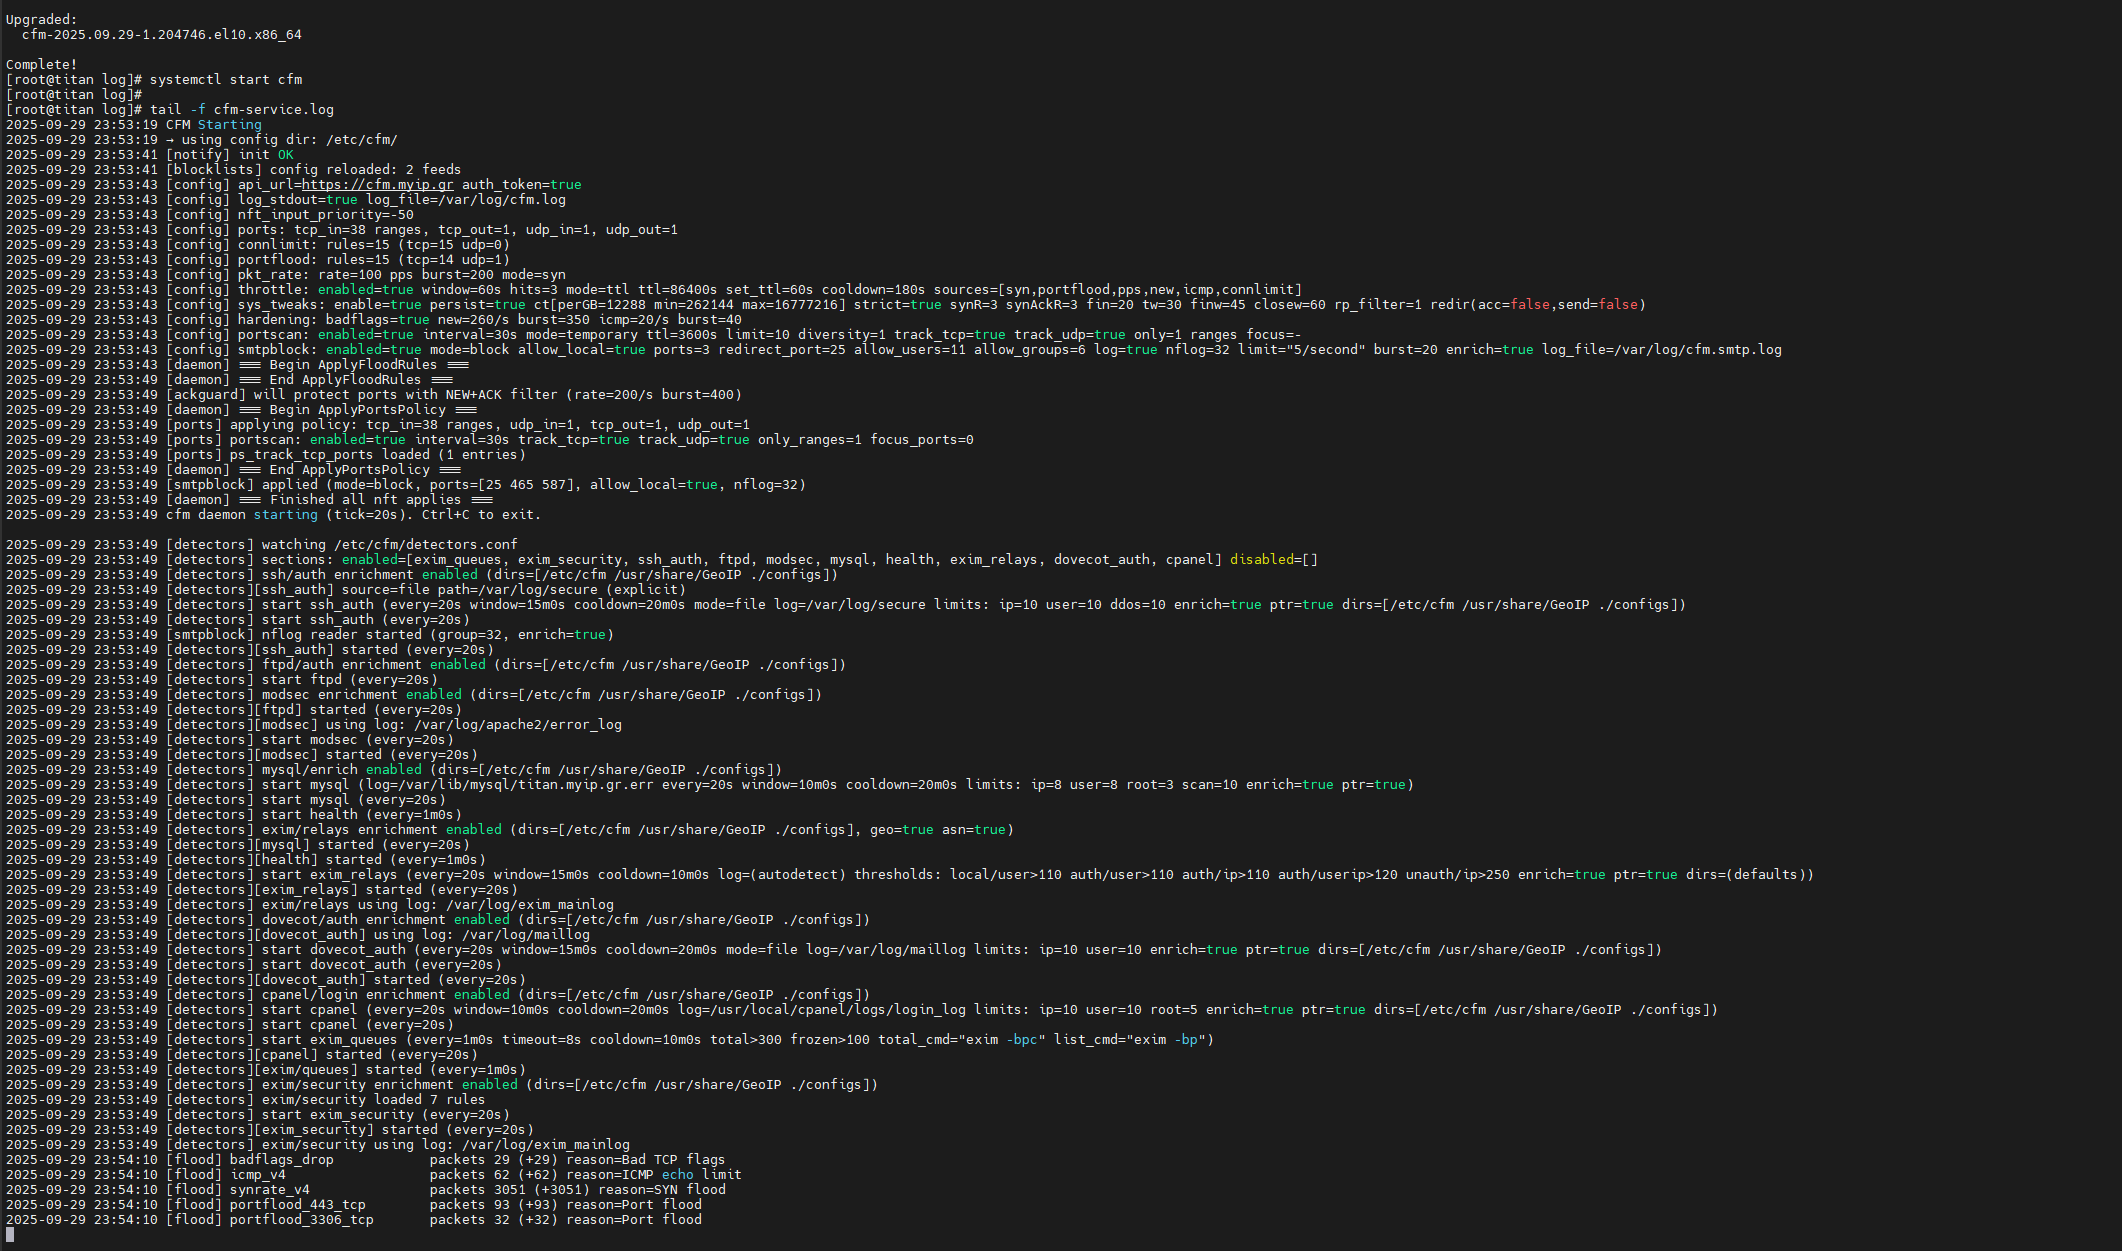
A Production-Grade, ML-Ready Traffic Analytics & Abuse-Detection Engine for Nginx, Apache & LiteSpeed CFM (Configurable Firewall Manager) started as a modern nftables-first firewall manager designed for high-security hosting and infrastructure operators.Over time, it evolved into a complete security platform: dynamic firewalling, live log-driven detection, autoblocking, system hardening, notifications, DNS/GeoIP enrichment, and API integration. Today, CFM … Read more